Changing the rear indicator lamps (or turn lights) to use sequential LEDs was one of the easiest upgrades I've made, and one that's easily transferred to a different vehicle if and when I update my MX-5 to a later version.
Supplied as a kit, the hardest part of the job was figuring out how to remove the rear light units. This is achieved from inside the boot. To begin, after emptying the boot, remove the studs pinning the floor carpet and also those fixing left and right sides directly behind the rear light units. I decided to leave the three large studs in the floor carpet as it was easily folded back out of the way, so didn't need to be completely removed.

Now you'll need to unclip the black plastic liner which also contains the interior boot light. Using a tiny screwdriver, gently prise the middle upwards in the centre of the studs, to allow you to remove them.
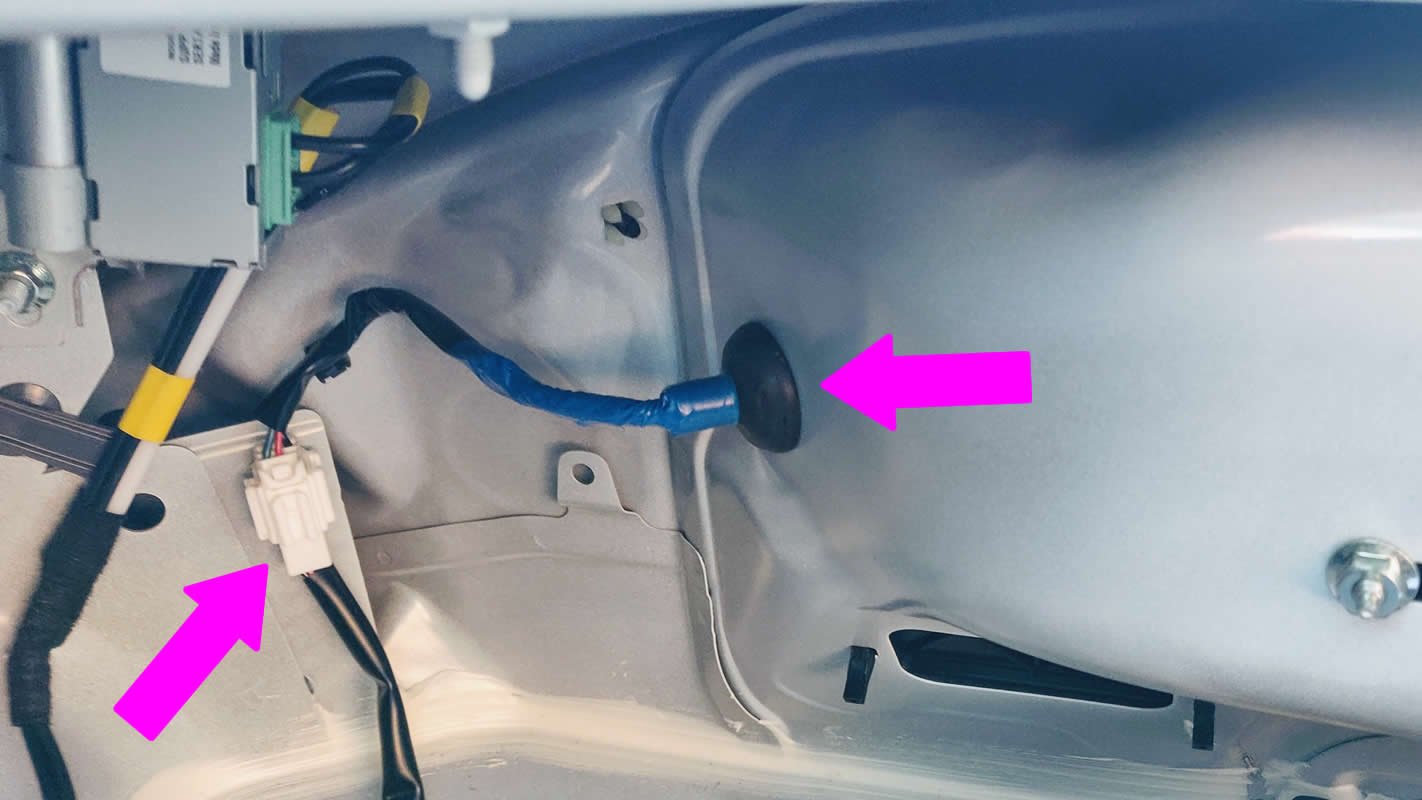
If you look in the corners of the boot, you'll see a domed rubber grommet with a wire in the centre. Gently push this out through the hole in the metalwork. At this point, I also unclipped the white plugs connecting the same wire to the car's electrical systems. Then remove the silver-coloured nut on the rear side of each lamp inside the boot using a 10mm spanner or socket and the single screw on top of each lamp using a cross-head screwdriver.
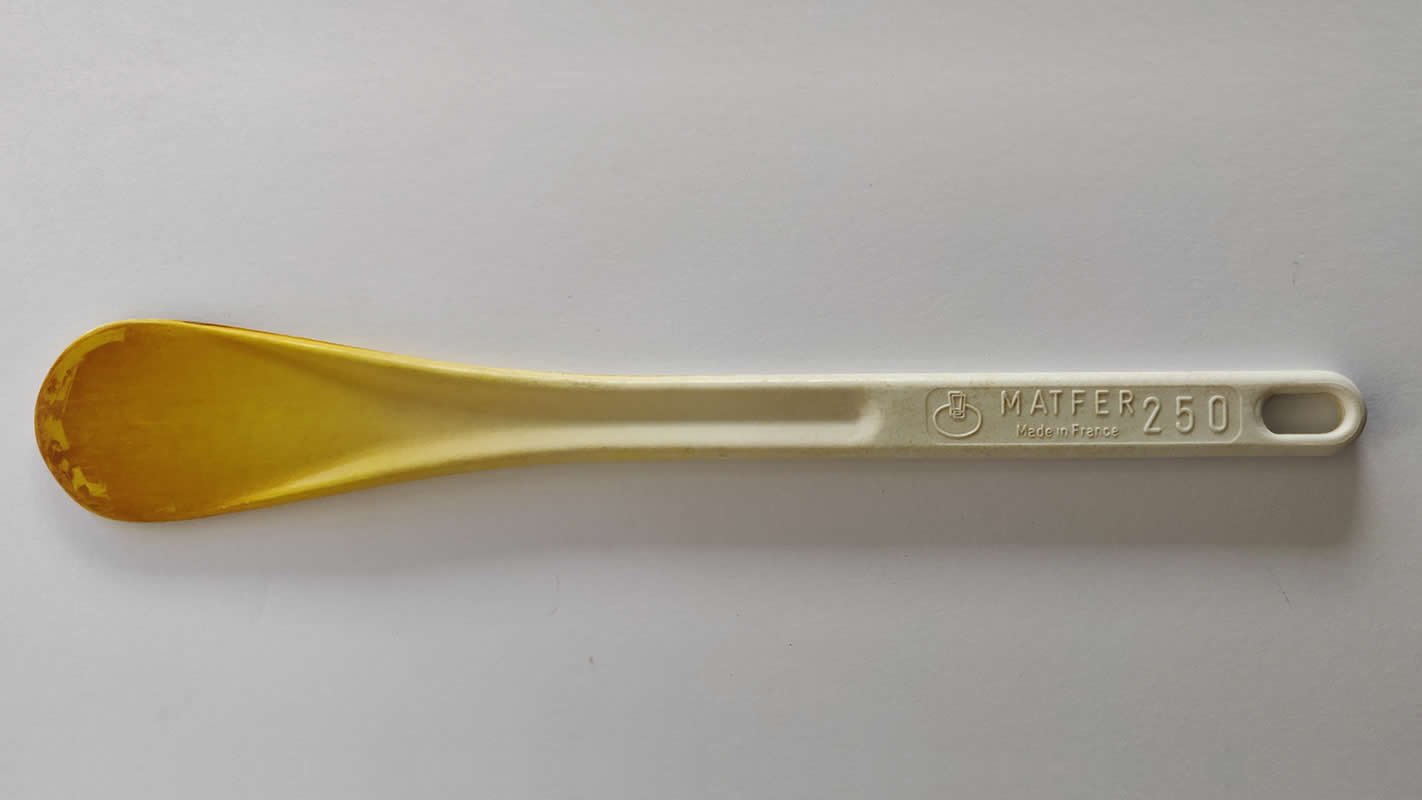
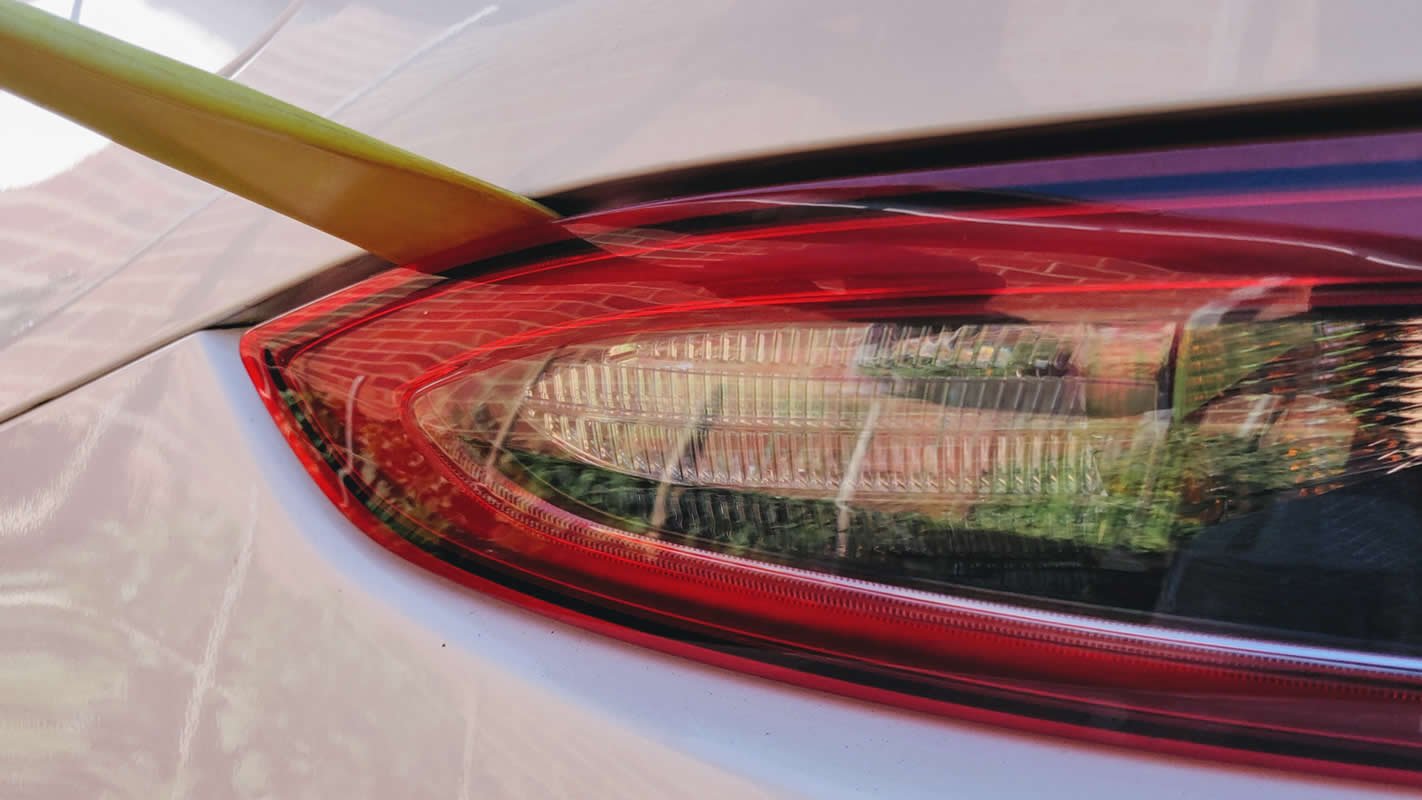
Now you need to prise the lamp unit away from the car. It's pretty tricky, but I've discovered a secret way of removing it which is so simple. From your kitchen select a small plastic pan stirrer or plastic spatula. It needs to be pretty thin, not too flexible and made from something that won't scratch the bodywork. Looking at the light you'll see the arrow markings that swirl around the long section of the red lamp cover. Holding the round part of the light with one hand, insert your kitchen utensil just above the arrow-shaped point about 5cm from the end of the lamp, where the clear section ends and pry it away from the bodywork. Please do not be tempted to put it in the very end and twist or you risk breaking the clips on the back of the lamp which will be very bad.
Once removed, you can feed the cable which you previously unclipped through the hole and place the light on a soft cloth, or back inside the boot if that's easier. Repeat the same steps to free the other light unit. Now you're ready to switch the amber lamps for the sequential LEDs. The cover twists clockwise/anti-clockwise. I used a glove to ensure I didn't graze skin off my knuckles and also to give a better grip. Due to the cables being quite short, once the amber light-bulbs are removed be sure to insert the LEDs into the opening before clipping them into the lamp holder and locking it back into place.

The light units clip back into place very easily, once they're in you'll want to pull the grommet back into place, screw on the silver nut and attach the cross-head screw. Before re-attaching the cabling, don't forget to attach the remaining pieces of wiring supplied in the kit. Having sorted that out, reattach the carpet, clip the boot light back together and clip-on plastic boot trim. Job done. Now you can turn on the electrical system / start the engine, admire your handy work and congratulate yourself on a job well done.